We’ve all been there. You get a sudden burst of weekend motivation, rush to the local hardware store, grab a gallon of the trendiest color you can find, and immediately start slapping it onto your living room walls. By Sunday night, your back aches, there’s paint in your hair, and as the morning sun hits the wall on Monday, reality sets in. You can see every single roller streak. The cut-in lines around the ceiling look like they were drawn during a minor earthquake. The paint is peeling off the baseboards where the tape failed.
Let’s be incredibly honest for a moment: painting a room looks deceivingly simple. You dip a fluffy stick into a bucket and roll it around. How hard could it be? The truth is, achieving that velvety, glass-like finish you see in high-end architectural magazines is an art form. It requires patience, strategy, and an understanding of the chemistry and physics of paint application.
If you are tired of settling for streaky walls, messy trim, and the dreaded “DIY look,” you are in the exact right place. We are going to strip away the amateur habits and rebuild your approach from the ground up. Whether you are aiming to create a serene, Modern Organic Minimalist retreat or just want your living room to look like you paid a professional $3,000 to do it, this guide is your blueprint. Here are the 14 expert tips the professionals use to achieve a flawless, professional-grade DIY paint job.
1. The Reality of the Roll: Why Most DIY Paint Jobs Fail
Before we crack open a can of paint, we need to talk about the psychology of a DIY renovation. Why do so many ambitious homeowners end up with subpar results?
1.1. Escaping the “Rush to Color” Syndrome
The biggest enemy of a flawless paint job is impatience. We call this the “Rush to Color” syndrome. The human brain wants the immediate gratification of seeing that beautiful new sage green or moody charcoal transform the space. Because of this, DIYers blast through the preparation phase. They skip the sanding, they do a sloppy job with the tape, and they start rolling before the room is truly ready. Professionals know that 80% of a perfect paint job is the prep work. The actual painting is just the victory lap.
1.2. The Modern Organic Minimalist Standard of Perfection
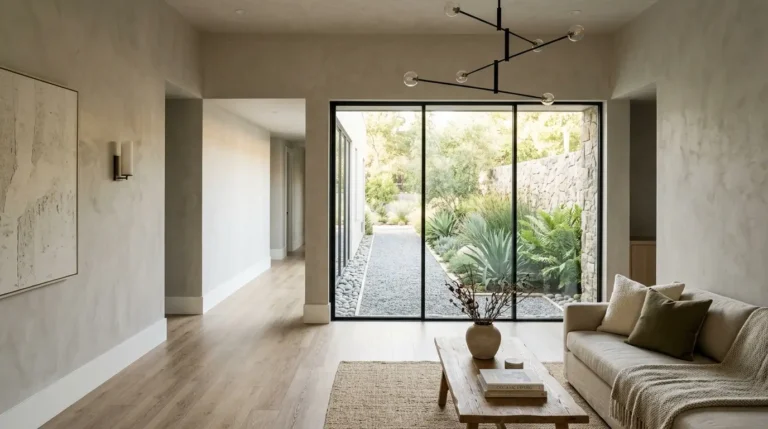
In today’s design world, styles like Modern Organic Minimalism rely heavily on smooth, unbroken surfaces to create a sense of calm. When you have a minimalist room, there isn’t a lot of heavy furniture or ornate art to distract the eye. The walls are the feature. Any bump, streak, or wobbly line will stick out like a sore thumb. To achieve this high-end look, you have to elevate your standards and treat your walls like a canvas.
2. Prep Like a Pro: The Foundation of a Flawless Finish
If you want a professional finish, you have to put on your hard hat and do the dirty work first. This is where the magic actually happens.
2.1. Tip 1: Empty the Room and Protect the Floors Completely
Do not try to paint a room by simply pushing your sofa to the center and throwing a flimsy plastic sheet over it. You will inevitably trip over a chair leg, bump the wall, or step in a rogue paint drip and track it across your hardwood floors.
Take the time to completely empty the room. Remove the switch plate covers and outlet covers—don’t try to paint around them; it always looks amateurish. For the floors, ditch the thin plastic drop cloths that slide around and create tripping hazards. Invest in a heavy-duty canvas drop cloth, or better yet, roll out heavy builder’s paper and tape it securely to the baseboards. A fully protected room allows you to move freely and focus on the wall, not on protecting your rug.
2.2. Tip 2: Wash the Walls (Yes, Really)
Paint is essentially a highly engineered glue with pigment in it. For glue to stick properly, the surface must be clean. Over the years, your walls accumulate a microscopic layer of dust, cooking grease, fingerprints, and airborne oils. If you paint directly over this, the paint will not bond to the drywall; it will bond to the dirt. In a few months, it will start to peel or chip.
Take a bucket of warm water with a few drops of mild dish soap (or a dedicated TSP degreaser for kitchens and bathrooms) and wipe down the walls with a large sponge. Pay special attention to the areas around light switches and door frames where hand oils collect. Let the walls dry completely before moving to the next step.
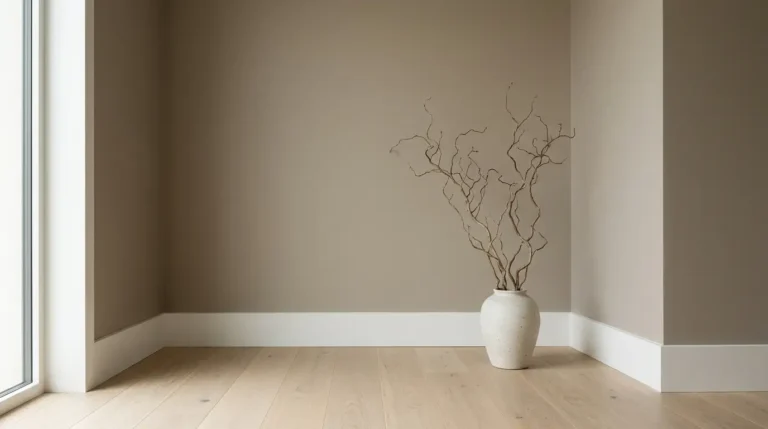
2.3. Tip 3: Patching and Sanding to a Glass-Like Finish
Every ding, nail hole, and dent will be magnified once the new paint goes on, especially if you are using a finish with any sort of sheen, like eggshell or satin. Use a high-quality, lightweight spackle to fill holes. But here is the secret: don’t just slop it on. Overfill the hole slightly, let it dry completely, and then sand it flush.
2.3.1. The Flashlight Trick for Invisible Patches
How do you know if your patch is truly flat? Turn off the overhead lights and hold a strong flashlight perfectly parallel (flat) against the wall, shining the beam across the patched area. This raking light will cast shadows on even the tiniest bump or depression. Sand with a fine-grit sponge until the shadow completely disappears.
2.4. Tip 4: The Non-Negotiable Power of Primer
Many paint brands aggressively market “Paint and Primer in One” formulas. While these are great for subtle color changes over an already perfectly painted wall, they are not a substitute for actual primer when you are dealing with raw materials.
If you have just laid down a fresh spray-on plaster mixture to smooth out a textured wall, or if you have large areas of raw spackle from patching holes, you absolutely must use a dedicated primer. Raw plaster and spackle are incredibly porous. If you apply topcoat paint directly to them, they will absorb the moisture at a different rate than the rest of the wall, creating a dull, flashing spot known as “dead paint.” A coat of high-quality drywall primer seals the surface, ensuring your final color glides on flawlessly and reflects light evenly.
3. The Taping Masterclass: Achieving Laser-Straight Lines
If there is one thing that separates a DIY job from a professional one, it’s the crispness of the lines where the wall meets the ceiling or the trim.
3.1. Tip 5: Invest in Premium Painter’s Tape
Do not use cheap, off-brand masking tape. It will wrinkle, it will allow paint to bleed underneath it, and it will likely rip the paint off your baseboards when you try to remove it. Spend the extra few dollars on premium, edge-lock painter’s tape (typically the blue or green varieties). These tapes are engineered with micro-polymers that expand when they get wet, sealing the edge and preventing bleed-through.
3.2. Tip 6: The “Clear Glaze” or “Base Color” Sealing Trick
Even with premium tape, heavily textured walls can allow tiny amounts of paint to seep under the edge. Professionals use a brilliant trick to combat this. After applying the tape to your baseboard, take a very small amount of the existing trim color (usually white) or a clear matte glaze, and paint a very light coat over the edge of the tape where it meets the wall.
What does this do? If any liquid is going to bleed under that tape, it will be this first coat. Once it dries, it creates an impenetrable, microscopic dam. When you go over it with your new wall color, it physically cannot bleed under the tape. When you peel the tape away, you will be left with a line so sharp it looks like it was cut with a laser.
3.3. Tip 7: Score the Tape Before Peeling
Have you ever pulled your tape off the trim, only to watch in horror as it rips a massive jagged chunk of your brand-new wall paint right off with it? This happens because modern acrylic paints dry into a flexible, rubbery skin. If that skin bridges the gap between the wall and the tape, pulling the tape will tear the wall.
To prevent this, wait until the paint is dry to the touch, then take a sharp utility knife or putty knife and gently score the exact corner where the tape meets the wall. You aren’t cutting into the drywall; you are just breaking that microscopic bridge of dried paint. Then, pull the tape away at a slow, 45-degree angle.
4. Arming Yourself: Tools of the Trade
A professional painter could probably paint a room beautifully with a cheap brush, but why make it harder on yourself? The right tools do half the work for you.
4.1. Tip 8: Ditch the Cheap Roller Covers
Those multi-packs of cheap polyester roller covers are the reason your walls look fuzzy and streaky. Cheap rollers shed lint onto your wet paint and don’t hold enough volume, forcing you to press harder against the wall, which creates those dreaded track marks on the edges.
Invest in high-quality microfiber or woven shed-free roller covers. For standard, relatively smooth walls, a 3/8-inch nap is perfect. It holds a massive amount of paint, releasing it smoothly and evenly without leaving a heavy, orange-peel texture behind.
4.2. Tip 9: The Magic of the 2.5-Inch Angled Sash Brush
When cutting in around ceilings, doors, and corners, a cheap, stiff, flat brush is your worst enemy. It will leave heavy bristle marks and fight you around every curve. You need a high-quality 2.5-inch angled sash brush with synthetic bristles (nylon/polyester blend). The angled tip allows you to act like a surgeon, drawing a perfect line of paint right into the tightest corners with ultimate control. Once you use a $20 brush, you will never touch a $3 bargain bin brush again.
4.3. Tip 10: Use a Sturdy Extension Pole (Even for Low Walls)
Many DIYers paint by holding the roller handle directly in their hand, bending down to hit the bottom of the wall, and stretching up onto their tiptoes to hit the top. This is exhausting, bad for your back, and terrible for the paint job.
Screw a sturdy, two-to-four-foot extension pole into your roller frame. This allows you to stand in one place and use the leverage of the pole to roll long, continuous, unbroken strokes from the ceiling all the way down to the baseboard. Continuous strokes mean fewer stops and starts, which translates to a much smoother, more uniform finish.
5. Application Techniques: Painting Like a Master
You’ve prepped the room. You have the tape locked down. You have the right tools in your hand. It’s time to put color on the wall.
5.1. Tip 11: Cut in One Wall at a Time to Avoid “Picture Framing”
“Cutting in” is the process of using your brush to paint the perimeter of the room (the ceiling line, corners, and around trim) where the roller cannot reach. A common amateur mistake is to cut in the entire room first, let it dry, and then come back to roll the walls.
When you do this, the brushed paint dries completely. When you roll wet paint over the dry brushed edges, it creates a subtle difference in texture and sheen known as “picture framing.” To avoid this, cut in only one wall at a time, and then immediately roll that same wall while the cut-in edges are still wet. The wet roller paint will seamlessly blend into the wet brushed paint.
5.2. Tip 12: Load the Roller Generously (Listen to the Paint)
Most DIYers do not put nearly enough paint on their roller. They dip it timidly, scrape most of it off on the ribbed part of the tray, and then scrub the dry roller against the wall until it squeaks. This dry-rolling pulls the paint, creating a patchy, uneven finish.
You want your roller to be fully saturated, but not dripping. Dip it deep into the well of the tray, and roll it back and forth gently on the grid until the nap is completely swollen with paint. When you apply it to the wall, you shouldn’t have to push hard. You should actually hear a subtle, wet crackling sound—almost like bacon gently frying in a pan. If the roller is silent, it’s too dry.
5.3. Tip 13: The “W” Technique is Dead—Roll Top to Bottom
For decades, hardware store pamphlets told people to paint a giant “W” on the wall and then fill it in. Professional painters do not do this. It creates erratic, crisscrossing patterns that show up under specific lighting.
Instead, start a few inches down from the ceiling and a few inches away from the edge. Roll straight down in a single column. Then, load the roller again, move over slightly, and roll another column, overlapping the previous one by about 50%. Once a three-foot section is covered, do a “lay off” pass: without adding more paint, gently roll the roller from the very top of the wall to the very bottom in one light, continuous motion. This aligns all the stipple (the tiny bumps left by the roller nap) in the exact same direction, resulting in a flawless, uniform finish.
5.4. Tip 14: Maintain a Wet Edge at All Times
Paint begins to dry and tack up within minutes of hitting the drywall. If you stop halfway down a wall to take a phone call, that edge of paint will begin to dry. When you come back and overlap fresh, wet paint over that sticky, half-dry edge, it will tear the surface and leave a permanent, visible lap mark.
The golden rule of painting is to always maintain a “wet edge.” Work quickly and methodically across the wall, constantly blending wet paint into wet paint. Do not stop for a break until you reach a natural breaking point, like an architectural corner or a door frame.
6. Conclusion: Unveiling Your Painted Masterpiece
Transforming a room with paint is one of the most rewarding DIY projects you can undertake. It is the fastest, most cost-effective way to entirely alter the mood, style, and energy of your home. However, as we’ve explored, achieving that breathtaking, flawless finish is not about luck. It’s about adopting a professional mindset.
When you take the time to meticulously prep your canvas, seal your painter’s tape, invest in high-quality tools, and master the mechanics of the wet edge, you elevate your work from a weekend chore to true craftsmanship. The next time the morning sun streams through your windows and grazes your newly painted walls, you won’t see roller streaks, flashing spots, or wobbly ceiling lines. You will see a smooth, serene, and sophisticated space that looks exactly like the high-end architectural magazines you admire. Grab your drop cloths, load up your roller, and get ready to create a masterpiece.
7. Frequently Asked Questions (FAQs)
Q1: How long should I wait between applying the first and second coat of paint? A: Patience is crucial here. Most high-quality acrylic latex interior paints require at least two to four hours of drying time before a recoat. However, drying time is heavily dependent on the temperature and humidity in your room. If the wall feels cool or slightly tacky to the touch, it is not ready. Applying a second coat too soon can reactivate the first coat, causing it to peel or pull away from the wall, ruining your smooth finish.
Q2: Do I really need two coats of paint if the first coat looks good? A: Yes, almost always. Even if you are painting a dark color over a light color and the coverage looks decent while it is wet, paint physically shrinks as the water evaporates during the drying process. As it shrinks, micro-pores open up, revealing subtle patches of the color underneath. A second coat provides true, rich depth of color, maximum durability, and ensures the sheen (the glossiness) is perfectly even across the entire wall.
Q3: How do I choose the right paint sheen (finish) for my room? A: Sheen dictates how much light the paint reflects. Flat or Matte finishes reflect zero light, making them perfect for ceilings or heavily imperfect walls because they hide bumps and patches beautifully. However, they are hard to clean. Eggshell or Satin finishes have a very subtle, velvety glow. They are the standard for modern living rooms and bedrooms because they look sophisticated but can be wiped clean with a damp cloth. Semi-Gloss is highly reflective and extremely durable, making it the go-to choice for baseboards, door frames, and cabinetry.
Q4: Should I remove the painter’s tape while the paint is wet or wait until it is dry? A: The best practice is to remove the tape when the final coat of paint is “dry to the touch” but hasn’t fully cured into a hard, rubbery skin. This usually happens about 45 minutes to an hour after your final roll. If you pull it while the paint is soaking wet, it can drip or splatter. If you wait until the next day when the paint is fully cured, you risk the paint forming a bridge over the tape, which will tear the wall when you pull it. Always remember to score the edge with a utility knife if you let it dry too long!
Q5: What is the best way to clean my paint brushes so they last? A: A high-quality angled sash brush can last for years if cared for properly. Immediately after painting, run the brush under warm water. Work a few drops of dish soap or specialized brush cleaner deep into the bristles near the ferrule (the metal band). Use a wire brush comb to gently scrape the dried paint out from the center of the bristles. Rinse until the water runs completely clear, shake out the excess water, and—most importantly—store the brush back inside its original cardboard keeper. This forces the bristles to dry completely straight, preserving the sharp, angled tip for your next project.